Home » Projects » Indoor » Cabinet Installation » Best Cabinet Installation Tools For DIY or Pro

Woodworking Tips & Guides

Best Cabinet Installation Tools For DIY or Pro

Updated: August 6, 2023
Without a laser level, cabinet jack and cabinet claw a quality cabinet installation is hard to do. In this guide learn what cabinet installation tools will make your next installation easier and faster.
Cabinet Installation Tools
Our content is reader supported. When you buy through our links, we may earn a commission. As an Amazon Associate we earn from qualifying purchases.

Best Cabinet Installation Tools For DIY or Pro

Cabinet Jacks To Lift And Hold

FastCap Cabinet Jack: Made In USA

MUST HAVE: CABINET JACK

Buy

ALSO IN THIS GUIDE:

  › CABINET CLAMP: BESSEY CLAW 

  › BASE JACK: VIKING ARM HAND

  › CROWN JIG: KREG CROWN-PRO

  › HARDWARE JIG: TRUE POSITION

  › CABINET LIFT: CABINETIZER

  › LIFTING: SHOULDER DOLLY STRAPS

The best cabinet installation tools are a combination of tools you likely have in the garage AND specialty tools for installing cabinets:

  • Laser levels to ensure perfectly level base cabinets for your granite tops
  • Cabinet jacks that will hold upper cabinets while you screw
  • Cabinet claws to make face frame cabinet installation faster

What is the benefit of investing a few hundred dollars in tools to install cabinets? 

Well, compared to a professional installation, you can still save thousands. Of course, if your skills or health don’t allow for an install’s lifting and demands, you will want to use a pro.

Types of Cabinet Installation Tools

Specialty Tools

  • Cabinet claws
  • Cabinet jacks
  • Cabinet hardware jigs
  • Cabinet wedges
  • Crown moulding jigs
  • Wood scribe

Basic Tools

  • Miter saw
  • Six foot level
  • Cordless drill
  • Stud finder
  • Trim nail gun
  • Hole saw
  • Belt sander
  • Jig saw
  • Laser level
  • Trigger clamps

Everything Else

  • Flust cut Japanese saws
  • Moving straps
  • Color Putty
  • Hearing protection

1. Stud Finder to Locate Studs and Utilities

Stud finder

See on Amazon: ProSensor 710 Stud Finder 

Cabinets are falling off the wall.

Drilling a cabinet knob in the wrong spot.

Hitting an electric line or plumbing with a screw.

There’s no reason to hit anything behind the wall while installing cabinets. Due to readily available 4-in-1 stud finders that can locate just about everything behind the wall, you can only safely install a kitchen with a stud finder.

Want another option? Check out cabinet hanging rail systems for an alternative to screwing cabinets directly to the wall.

Features of popular stud finders:

  • Locate wood stud edges to center screws
  • Find electrical lines
  • Identify plumbing/utility lines
  • Metal stud identification

2. Cabinet Jack To HOld Upper Cabinets While Installing Screws

Cabinet Jack

See on Amazon: FastCap UpperHand 

Installing upper cabinets is usually a team effort.

One installer lifts and holds the upper cabinet while the other installer aligns, installs screws, drops screws, wants an adjustment, and,  you guessed it, the fighting can start.

But, using a cabinet jack frees both installers to do the critical work by simply fitting under the upper cabinet and taking the weight. And with a micro-adjustment handle allows for precision placement of the cabinet.

Thus, freeing you to worry about alignment, shims, cabinet screw installation, and level.

And, as a bonus, these jacks work great to help install microwaves and shelving.

Related Article: DIY Guide to the Best Cabinet Jacks

3. Cabinet Hardware Jig To Drill Handles and Pulls

Cabinet Hardware Jig

See on Amazon: True Position Tools Jig 

After drilling hundreds of drawers and doors, my first experience with a cabinet hardware jig was disappointing and exciting.

Disappointing? Only because I had yet to purchase one sooner and saved myself the hassle of slightly crooked handles.

Aside from being able to drill repeated holes quickly, this jig prevents drill bits from wandering in course grain wood like oak.

There are dozens of imitations on the market – professionals know True Position Tools has the best jig. And, with its class-leading ruler length can handle even the widest of drawers (or long handlebars).

4. Cabinet Claw for Face Frame Cabinets

Bessey Cabinet Claw

See on Amazon: Bessey Cabinet Claw  

While a traditional clamp will squeeze two pieces of wood together, they only work in one dimension.

The challenge with cabinets? Frames need to be compressed together and keep their back-to-front dimension flush.

The solution? A cabinet claw that clamps in two directions. And, as a bonus, it has a guide bushing to drill holes for trim head cabinet installation screws. When it comes to cabinet installation tools, these simple clamps are a must-have.

5. Color Putty to Hide Gaps and Holes

Color putty

See on Amazon: Color Putty  

I have yet to install a kitchen I didn’t use Color Putty on.

Due to its playable, finger-friendly application, it can be applied anywhere. And with the ability to mix colors to customize your project, it is the ultimate versatility.

Where would you use it? Well, crown molding nails, face frame gaps, toe kicks, base shoes, and any other nail head or crack can be quickly made invisible.

6. Wood Scribe For Fitting Cabinets and Walls

Trend U/E wood scribe

See on Amazon: EasyScribe Scribing Tool 

So connecting flat cabinets is simplified with clamps and screws.

But how do you match a flat cabinet to a curved wall?

With a wood scribe, of course. This tool traces the wall’s outline to the cabinet’s edge. Then, using a belt sander, you can sand the edge of the cabinet filler strip or cabinet to match. All of which makes this a must-have among cabinet installation tools.

Related Article: Guide to Wood Scribes

7. Laser Level For Ensuring Perfectly Flat Counters

Laser Level

See on Amazon Bosch 30ft Cross-Line Level 

I had to re-install the base cabinets in a kitchen a dozen or so years ago when the (incredibly) uneven floor caused leveling issues. 

Why? The solid surface installers rejected the plane as it wasn’t perfectly flat. They were a little too picky, but regardless it cost me a half day to fix.

If your kitchen will have solid surface counters AND you have an L or U-shaped kitchen, it’s worth using a laser level to ensure your base cabinets are installed flat. 

To use one of these tools, you’ll want to install it on a pole in the center of the room and set the laser line for the upper cabinets (bonus, not required) and base cabinets, so you have a visual reference to “perfect.” Then install and ship cabinets to this obvious line.

If you have the budget, a 360-degree laser is best. 

8. Crown MOlding Jig for Easier Cuts

Kreg crown jig

See on Amazon: Kreg Crown Jig 

Cutting crown molding can be tricky for even a professional. With the compound angles, you’ll need to put your saw through (if it’s even capable), precise fit requirements, and math, most DIY’ers struggle.

The solution? This simple jig will take one of the compound angles away, letting you cut a 45-degree (or other) and worry about a single dimension.

9. Cabinet Wedge to Shim Cabinets

Cabinet wedge

Now this tool might be a surprise to even a cabinet installation professional.

The cabinet wedge is an air-powered wedge that will help with a task you don’t even know will be an issue: lifting base cabinets just ever-so-slightly to find the perfect level.

And then you can place the shim.

But seriously – is this worth it? Yes! Leveling base cabinets on uneven floors is a significant pain point, and this nifty tool (or 3 of them, in fact) will make the job easier.

The alternative? You’ll lift, shim, and level while fussing with shims and bulky cabinets. And I wouldn’t say I like that amount of time on the floor.

10. Trigger Clamps for frameless Cabinets

Trigger clamps

See on Amazon: FastCap Jack of All Trades 

As an upgrade to the cabinet wedge (at least for base cabinets) and a 2-in-1 deal for frameless cabinets make this FastCap unique tool a professional consideration.

Key features:

  • Reversible jaw for lifting or clamping
  • Large, heavy-duty trigger clamp for firmly holding frameless cabinets.
  • FastCap innovation and reputation

And coupled with the cabinet jacks, the combination provides a quick and effortless way to steady a cabinet and securely screw it with perfect alignment vertically and horizontally.

11. Six Foot Level For Installing Cabinets

Six foot level

See on Amazon: OX Tools Tradesman Level 

You can only install a kitchen with a proper level.  And I’m not talking about that 12″ long plastic level you have in the utility drawer.

A cabinet installation requires at least a 6′ level for several reasons:

  1. Ensure cabinets spanning gaps over ranges, sinks, and other areas are level.
  2. Checking cabinet alignment vertically between upper and lower cabinets.
  3. Make sure your lower cabinets are flat for installing solid surface tops.

This is an easy cabinet installation tool to skip, but the consequences can be expensive if your project needs to be level.

12. Belt Sander For Flushing Cabinet Frames

Belt sander

See on Amazon: SKIL 6-amp Belt Sander 

I am trying to remember an installation where I didn’t use a belt sander to adjust a face frame or cabinet back. 

Due to kitchen walls and drywall that aren’t perfect, you’ll need a belt sander to adjust the cabinet sides, face frames, or bases.

Because your woodworking aspirations will determine what size and type of belt sander you’ll need, there is a range of cheap to professional. For example:

  • A single installation of a belt sander can be found for under $50 that will do the job.
  • But for around $200-250, you’ll find sanders with more power, better dust collection, and larger belts.

13. Japanese Saw for Flush Cuts

SUIZAN Japanese Pull Saw Hand Saw 9.5 Inch Ryoba...

While I prefer a composite shim for cabinet installation because they snap off, if you found yourself with wood shims, a flush cut Japanese saw is a fantastic way to do flush wood trimming.

A great benefit of this tool is it’s reusable for future woodworking projects where flush cuts are needed (dowels, thru tenons, etc.).

14. Cordless Nail Gun

Cabinet installation tools - nail gun

Cabinet installation almost always involves some sort of trim – including the tough-to-tackle crown molding.

And while you could tackle this with a pilot bit, brads, and a hammer with a nail set, I’d recommend against it.

Especially with four everyday nailing tasks:

Best of all, if you own one of the modern battery ecosystems, there’s a cordless option to skip the noisy air compressor.

16. Miter Saw For Cutting Trim

miter saw

Every cabinet installation requires a miter saw to cut trim and crown molding.

Because it makes quick work of helping install cabinet filler strips between face frames, cutting trim, and slicing complex angle crown molding, you’ll find installing a kitchen without one a challenge.

Here are a few things to look for:

  • You can skip the cost of the compound sliding miter saw if you use a General Tools jig as mentioned above
  • But, make sure you invest in blocking or an in-feed / out-feed table for supporting the trim
  • 10″ is acceptable for homeowner use (I build kitchens with a 10″ saw) 

17. Jig Saw for Cutting Pluming and Electric Holes

jig saw

See on Amazon: Dewalt Cordless Jigsaw ?

While not something you think about first, every cabinet installation requires a few outlet and plumbing holes to be cut. 

And, if your project will continue to install laminate counters, you’ll need this for cutting out the sink hole.

Here are a few features that should be top of mind for a jigsaw:

  • Adjustable stroke for aggressive cuts in softwood, or less aggressive in harder woods (and laminate tops)
  • Smooth machined bottom to not scratch the surface
  • And variable speed control to adapt to a number of teeth on the blade
  • Cordless to avoid (literally) cutting the cord

18. Hole Saw Set for Plumbing

Hole saw set

See on Amazon: Dewalt Hole Saw Set 

Every kitchen or bath installation involves drilling a few well-placed 1-3″ holes in the cabinets for plumbing hot/cold water supplies, waste return lines, and dishwasher hoses.  

While you can see these holes, I prefer to take a few extra minutes and locate the spots and then use a slightly larger hole-saw.

Here are a few things to look for:

  • Variety of hole saws up to 4″
  • Quality of the mandrel
  • Depth of the hole saw for thicker material

Fortunately, most hole saw needs in cabinets are for thin material up to 3/4″. So, no need to break the bank on a cabinetmaker-grade set of hole saws.

19. Hearing Protection

hole saw set

See on Amazon: 3M Bluetooth Ear Muffs 

Most forget about this crucial part of cabinet installation until the saws and nailers start.

Butw you’ll need high-quality noise-reducing headphones to avoid ear damage.

And with Bluetooth hearing protection, you can listen to music or make and take calls from these earmuffs.

20. Cabinet Moving Straps

Cabinet moving straps

See on Amazon: Shoulder Dolly Moving Straps 

Remember, the first part of installing cabinets is getting them in the room.

And for a DIY installation, that can mean a heavy lift of bulky cabinet boxes.

So, why not take a page from appliance movers and prepare ahead with shoulder straps designed to redistribute the load and prevent injury?f

Frequently Asked Questions

Frequently Asked Questions

What tools are needed to install kitchen cabinets?

While many tools are required, a cordless drill, miter saw, jigsaw, cabinet jack, cabinet claw, and a level are the primary tools.

Can I install kitchen cabinets myself?

Yes, but only with the right tools, like a cabinet jack or lift, that will allow you to support upper cabinets in the air.

What screws do I use to hang cabinets?

The standard screw is the GRK Cabinet Screw with a 2-1/2″ length length. However, specialty screws like the GRK Trim Head are used to connect face frames.

How do you hold cabinets in place during installation?

To hold cabinets in place during installation, use a cabinet jack that will allow you to make minor adjustments to the cabinet height and have the cabinet in place.

Conclusion

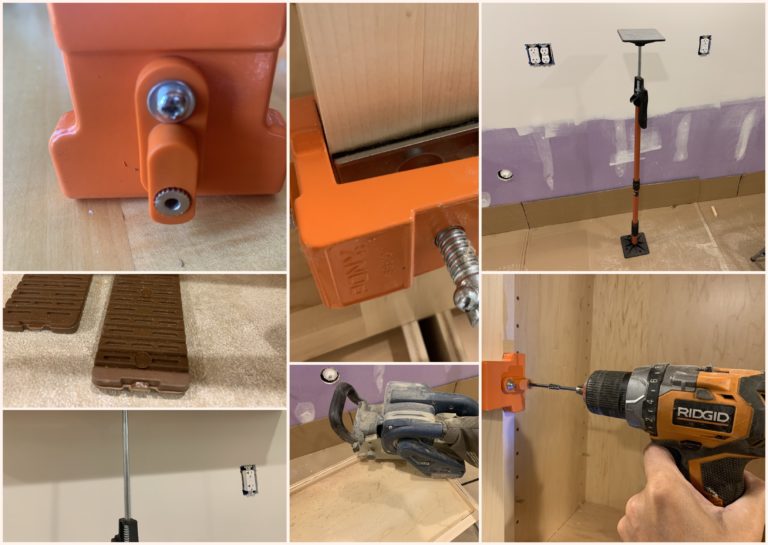
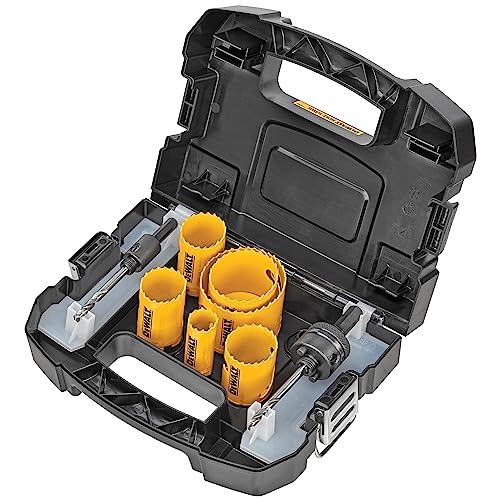
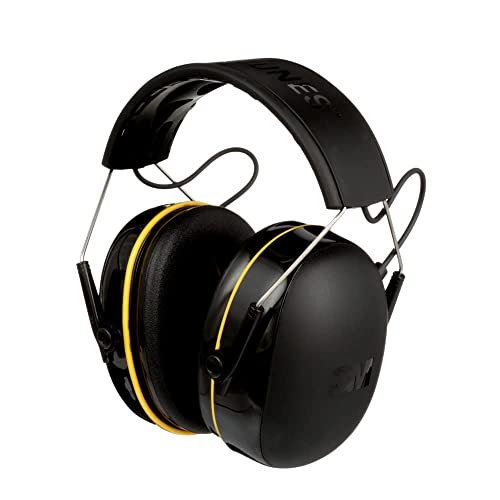
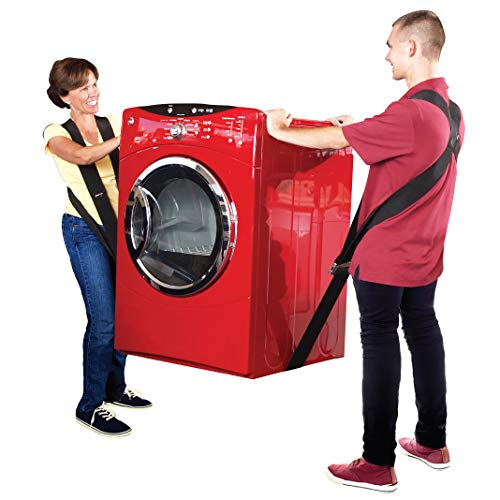
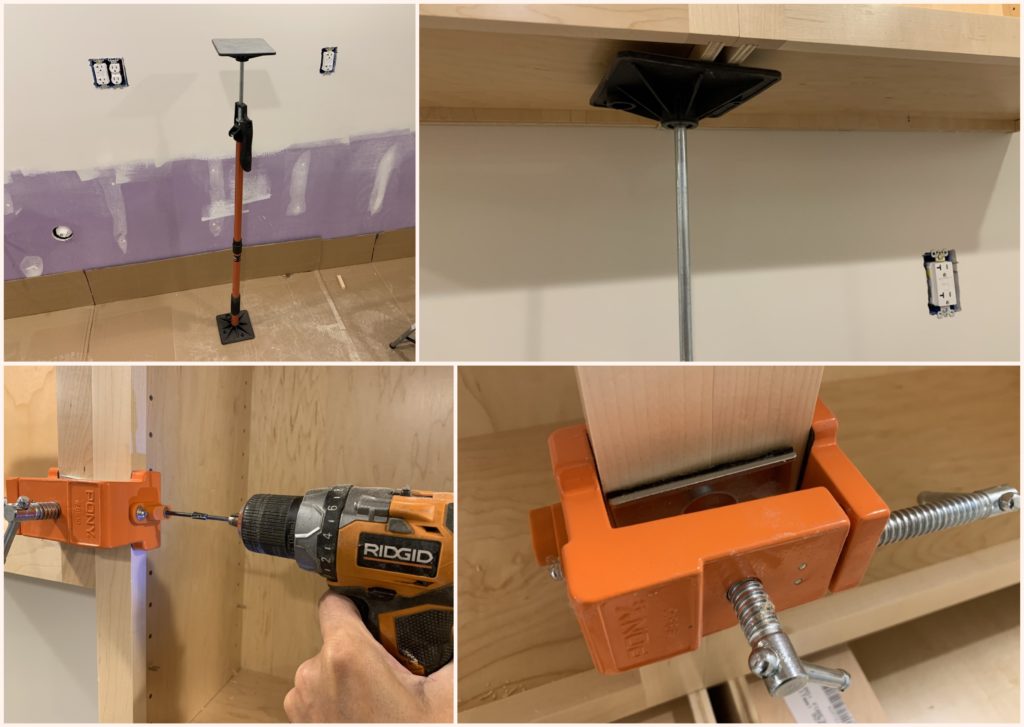
By now, you probably realize the right cabinet installation tools are the difference between a good and excellent installation. So, rather than find out during your installation, you could use a tool to grab them first. 

  • About the Author
  • Latest Posts
( Woodworker )

Eric has been a professional woodworker for over thirty years and has worked in small cabinet shops making everything from kitchen cabinets to hand-made furniture. Now working from a home woodworking shop Eric is sharing his passion for woodworking, tool advice and how-to knowledge from his Minnesota-based woodshop.

2 thoughts on “Best Cabinet Installation Tools For DIY or Pro”

  1. Great article, thanks for putting all of this together! I was laid off last year and started building cabinets, looking to fill a gap and start installing them myself as well. I’ve been piecing some of this together but this is thorough and comprehensive. I’ve also been helping out Sleep in Heavenly Peace lately as well, awesome organization.

  2. Adam,

    Appreciate the nice comment and hope things are turning around – SHP is a great organization and good to hear you are able to help!

    Eric

Leave a Comment

Need Wood?

Subscribe for a FREE directory to 300+ hand-selected local and online hardwood retailers.

Exterior Barn Door With Galvanized Hardware

Exterior Barn Doors, Hardware And How to Build One

Building an external barn door is a great DIY project. Since your construction doesn’t need to be picture perfect this style of door can be built and used on just about any outdoor structure. In this guide learn basic construction techniques and hardware to use outdoors.

Read More »
Festool Domino DF500

Domino vs Biscuit Jointer and When To Use Each One

While biscuit joiners have been around for decades it is only recently that the Festool DOMINO has become “the” tool to own for loose tenon joinery. In this article learn the differences between a domino joiner vs biscuit joiner and what’s best for your projects.

Read More »

Disclaimer: DIY projects can be dangerous, hire a professional (link to Home Advisor) if unsure.