


SaleBestseller No. 1 
Milescraft 1405 Crown45 - Crown Molding Tool,...
- Compact design works with most miter saws
- Makes right-side-up cutting of 2″ to 5-1/2″...
- Supports Crown molding between 2″ to 5-1/2″
- Adjustable angle setting with angle finders for...
- Saw blade enters the material from the front
SaleBestseller No. 2 
AltitudeCraft Miter Saw Crown Stops & Protractor...
- Essential Woodworking Tool Set – This 2-in-1 set...
- Compatible with Popular Miter Saws – The miter...
- 360° Protractor Angle Finder for Precise...
- Durable Aluminum Construction Built to Last –...
- Improve Accuracy and Reduce Waste – This Crown...
SaleBestseller No. 3 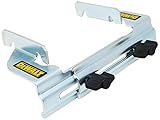
DEWALT Miter Saw Crown Stops (DW7084)
- Miter saw crow stop accurately positions crown...
- Accurately positions crown molding vertically...
- Tough, steel construction
Bestseller No. 4 
Kreg KMA2800 Crown-Pro Crown Molding Tool
- The Right Cut: Beautiful, seamless-fitting crown...
- Many Angles: Adjustable spring base locks anywhere...
- Crown Molding Cutting Tool: Eliminates...
- Angle Finder: Measures exact angle of inside and...
- Premium Kreg Tools: We offer products that help...
Bestseller No. 5 
FastCap Crown Molding Clip - Great for General...
- Professional Solution - FastCap's Crown Molding...
- Durable Construction - Made from sturdy nylon, the...
- Easy to Install and Remove - The Crown Molding...
- Versatile Use - This clip is perfect for a variety...
- Efficiency Booster - The Crown Molding Clip not...
Last update on 2025-06-17 at 08:32 / Images from Amazon
While installing crown molding properly is arguably the most challenging step of most cabinet installations, it is also the most rewarding.
Be sure to check out our cabinet installation series for your next steps.

- About the Author
- Latest Posts

Eric has been a professional woodworker for over thirty years and has worked in small cabinet shops making everything from kitchen cabinets to hand-made furniture. Now working from a home woodworking shop Eric is sharing his passion for woodworking, tool advice and how-to knowledge from his Minnesota-based woodshop.


