
FastCap Upper Hand Jack
Holds Upper Cabinets During Install
MUST HAVE: FASTCAP JACK
Many professional woodworkers have installed many kitchens that need help.
However, aside from the arm strength to lift the cabinets, there are a few techniques that pros will use to make the job easier (and safer):
- Using the right cabinet installation tools
- Starting with the right upper cabinet
- Tools to hold the cabinet in the air
- Choosing the best screws (that won’t fall off the bit!)
Page Contents
How to Hang Upper Cabinets by Yourself
It’s tempting to save that $2000+ a professional will charge. But, because cabinets are usually 3-4 times more expensive than the installation, it just doesn’t make sense to damage them (or worse) by trying to save a few dollars. Especially if you have yet to gain prior woodworking experience.
With that resolved, let’s take a look at how to hang upper cabinets by yourself:
1. Preparing the space

Before attaching cabinets to the wall, you’ll need to answer one question. Which upper cabinet will go up first?
While every kitchen is different, there are a few rules of thumb: which cabinet, what height, planning for filler strips, and considering appliances.
Trust me, installing the upper cabinets first is a must to avoid awkward lifting over base cabinets.
Picking the first upper cabinet to hang
You might have guessed it, but the shape of the kitchen will decide where you start. This is the first big decision as you learn how to hang upper cabinets by yourself. Let’s look at the most common configurations:
- L-shaped kitchen: In this configuration, you will have a single corner cabinet with upper cabinets extending to the left and right. Start with the corner cabinet. This may be a “single” corner that is an odd shape (like a baseball diamond when looking at the top) or a straight cabinet with a face frame that “stops” where another cabinet will fit into it.
- U-shaped kitchen: Similar to the L-shaped, a U-shaped kitchen also starts with the corner cabinet, but you may have two corners. Which one should I start with? I’d recommend starting with the cabinet with the refrigerator on one of its walls. Why? The height of the refrigerator cabinet is a crucial concern. We’ll get to that later.
- Straight wall – no refrigerator: Start with the cabinet that might go into a corner wall. If there are no end-walls or refrigerators, a starting point might be lower cabinet appliances. Why? Filler strips are usually required, and I try to plan them around appliances to avoid unnatural gaps in the cabinets.
- Straight wall – with a refrigerator: If you have a refrigerator side panel (wood), starting with the refrigerator cabinet is a good starting point.
Find the starting height
You can find this in minutes with the help of a laser and a good tape measure. When installing upper cabinets yourself, the last thing you’ll want to do is redo the installation.
Steps to finding the starting height:
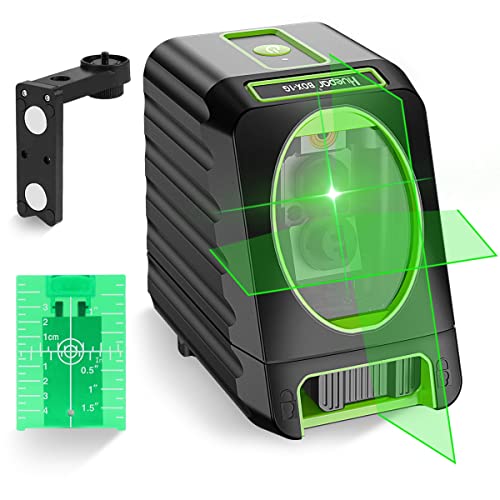
- Find the highest floor point in your kitchen. A laser level with a 360-degree beam is invaluable for this. I recommend the Firecore F112R laser and a floor-to-ceiling Firecore pole.
- Set the laser beam at 54″ (the standard floor-to-ceiling height for cabinets).
- Measure the distance from the beam to the floor every few feet along the wall. You have a high spot if your measurement is less than 54″.
- Keep searching across all the walls until you find the “lowest” measurement.
- Set the laser level to read 54″ at this high point, and you have your starting height.
Plan ahead for cabinet filler strips

The cabinets likely came with filler strips for your room measuring an “odd” width vs. standard cabinet dimensions. If you had a design service, they should have indicated where these go. Make sure you follow that plan.
If you self-design using box cabinets, ensure you have filler strips and do an overall layout yourself.
Generally, try to plan filler strips around appliances and “split” them so you don’t have a 2″ filler strip creating a visual “why is that there.” Instead, use two 1″ strips where they will be visually complementing.
Laying out the appliances
Only the microwave layout matters for the upper cabinets, right? Well, not necessarily.
Any gap in the upper cabinets corresponding to a range (standard), sink, or refrigerator must be pre-planned. Typically this is for ensuring filler strips on the upper cabinets are planned and will put the range in the correct position.
Remember – the microwave or range hood cabinets must be vertically “level” with the base cabinets.
2. Lifting the Cabinets In Place

There are a few schools of thought on installing cabinets. And while some “old school” installers use a ledger board, I’ve never seen a good reason to put holes in finished sheetrock that will show.
Do you know how you can lift the cabinets and hold them?
Well, there are a few solutions:
- As mentioned, use a cabinet jack to hold the cabinets
- Or, if lifting is going to be an issue, a cabinet lift will take a 200-pound cabinet to a finished height without you breaking a sweat
- Cabinet hangers allow you to install cabinets by simply lifting and dropping them into place.
- Lastly, consider the ledger board method if you are sorting out the job. But I don’t prefer it…
3. Using Clamps as Your Fourth Hand

While FastCap has named their cabinet jack the “3rd Hand”, a cabinet clamp for frameless or face frame cabinets could aptly be called the “4th Hand”.
When installing cabinets, you’ll need to understand the cabinet box construction:
- Cabinets without a face frame are called frameless, and you can use a high-quality cabinet clamp to secure the sides.
- However, a face frame cabinet can use the cabinet claw (mentioned earlier)
So, during the installation, you can lift the cabinet in place, set it on the cabinet jack and then use a clamp to firmly position the upper cabinet.
4. How to Install Upper Cabinets Yourself Without Screws

Installing upper cabinets is a balancing act.
You’ll be balancing the cabinet in place while inserting screws.
An alternative to this is using a cabinet hanging rail system like the one from EazyHang. While an added expense, a small investment in the hangers allows you to turn the rail, install fasteners to the cabinets, and lift them in place.
5. Have the Right Cabinet Screws and Supplies on Hand

If you skip the cabinet hangers, you’ll return to using cabinet screws.
But you’ll need the right ones that don’t fall off the drill driver. And, to further complicate it, you’ll need three different types of screws to:
- Attach the cabinets to the wall
- Screw the cabinet sides together
- Connect the face frame with trim head screws
You can learn more about these screws in our cabinet installation screw guide.
Lastly, you’ll want composite shims that are consistently sized, slide between the wall and cabinet with ease, and can be “snapped” to length vs. cut.
6. Installing Cabinet Crown Molding by Yourself

While maybe not your first thought, one of the last tasks in a solo kitchen installation will be the installation of crown molding.
Which has a surprise waiting for you if any of the trim is longer than 3-4 feet.
Why? Well, you’ll need to follow these four steps:
- Measure
- Cut
- Hold
- And, then nail the crown molding and ensure its accuracy is perfect
Do you know what can help? Well, a 3rd Hand Jack will offer the reach and swivel head to support your crown.
Frequently Asked Questions

Is it difficult to hang cabinets?
Most DIY’ers can install cabinets with the proper planning, tools, and patience. While cabinets are heavy, they can be held in place by cabinet jacks or lifts to take the weight off you.
Do you screw base cabinets to the wall?
Base cabinets are almost always screwed to the wall. Generally, the only exception to this rule is an island cabinet screwed to the floor.
Summary
Hopefully, this article helped you understand how to install upper cabinets yourself.
But, if you want to learn more about installing cabinets, check out our series on cabinet installation for more tools and supplies to make your installation go smoother:

Cabinet Installation Series
Planning & Tools To Install Cabinets
Guides for Cabinet Installation
Finishing Cabinets With Molding and Hardware
Tools on Amazon


Last update on 2026-02-12 at 13:52 / Images from Amazon
- About the Author
- Latest Posts

Eric has been a professional woodworker for over thirty years and has worked in small cabinet shops making everything from kitchen cabinets to hand-made furniture. Now working from a home woodworking shop Eric is sharing his passion for woodworking, tool advice and how-to knowledge from his Minnesota-based woodshop.


E.D. ,
I read your cabinet installation tips. Watch my installation system video and let me know if you would like a sample kit to review the system. It makes wall cabinet hanging simple.
Tim Trunkle
http://www.eazyhang.com