Home » Projects » Indoor » Cabinet Installation » DIY Guide: Installing Toe Kick on Cabinets

Woodworking Tips & Guides

DIY Guide: Installing Toe Kick on Cabinets

Updated: June 19, 2023
Installing toe kick on cabinets is one of the last steps in a cabinet installation. In this guide learn how to pick the right place to start, how to cut and trim the toe kick and then attach it securely to the cabinets.
Installing Toe Kick on Cabinets
Our content is reader supported. When you buy through our links, we may earn a commission. As an Amazon Associate we earn from qualifying purchases.

DIY Guide: Installing Toe Kick on Cabinets

Cabinetry Panel Adhesive

Securely Glue Toe Kick

CABINET PANEL GLUE

Buy

Surprisingly, installing toe kicks on cabinets is more complex than some would expect. Due to variations in material, methods to attach, and surprises like uneven floors and cabinet faces, a few tricks and hacks are often needed.

In this guide, learn:

  • Tools required to install to kick
  • Methods for installing various styles of toe kick
  • What piece to start with
  • How to adjust the toe kick for uneven floors
  • And lastly, how to hide the nail holes (hint: Color Putty)

Tools Needed to Install Toe Kick

Toe Kick Installation With Vent

If you’ve installed the cabinets, you’ll have all the tools needed for this step. But if you haven’t started, make sure to have the following on hand:

Steps to Installing Toe Kick

Step 1: Installing toe kick longest piece first

Measure toe kick for longest piece

If you’ve installed trim before, you know one trick is constantly installing the longest toe kick piece first.

And this same rule applies to installing toe kicks.

What’s so special about doing this? By following this approach, you can make mistakes with cutting longer strips and then use them for shorter pieces of toe kick.

Finally, consider that the longest toe kick might be designed to fit behind a base cabinet and extend to the wall (hidden).

Tip: One part of the puzzle can be keeping everything in order. I like to lay the strips on the top of the base cabinet, so I know where they’ll go.

Step 2: Cut the toe kick to length

Cutting toe kick with a miter saw

After you’ve set the toe kick in the right spots and are ready to start assembling, it’s time to start cutting.

Here are a few tips on cutting toe kicks:

    • Cut once, measure twice, and try fitting the toe kick after each cut. You’ve made it this far on your cabinet installation, don’t ruin it now.
    • Use a sharp blade: The back of some toe kick ends will be seen after installation. It’s important not to “blow out” the toe kick back and create a splintered mess. I use the five-star rated Makita 80-tooth crosscut blade  on my miter saw.
    • Avoid 45-degree cuts on inside corners. It’s much easier to install at a 90-degree angle.
    • Cut the toe kick lying flat on the miter saw with the finished side up.
    • Cut slowly to avoid splintering the back of the toe kick – but not slow enough that you burn the ends
    • Lastly, use a wood sander to buff the cut end for later finishing/touch-up if it is visible.

In this step, you’ll find that they will likely need to be cut to length before installing toe kicks. Because every kitchen is designed differently, the toe kicks rarely come pre-cut.

Step 3: Rough fit the kick

Before installing the toe kick, I like to cut and fit all adjacent toe kicks. Because of variations in the floor or other gotchas, this prevents having to rip out the toe kick later.
  • Start in a corner with the longest piece
  • Use a belt sander to adjust the width or adjust the joints
  • Work from the corner out one piece
Next, double-check that the cabinets are perfectly level. Because once the toe kick is installed, you will need help to adjust the bases. If you haven’t started your installation yet,  check out the guide to cabinet installation tools for levels and lasers.
 
Sometimes toe kick will need a little sanding to adjust to the floor, and a belt sander is one of the best tools to remove wood to help with the fit quickly.

Step 4: Installing the kick to the cabinet

Installing the toe kick with a cordless nail gun

There are two more steps to install a toe kick under your almost completed kitchen.

The quickest way to install a toe kick is with a few well-concealed nails at the base and then again at the top of the toe kick. Why there? Well, if you hold the nail gun level and install brads at the top, you won’t see the nails. And again, at the very bottom, you’ll usually install a base shoe as well, so the nail will again be hidden (later).

However, if your toe kick is a thin 1/4″ strip of plywood, use construction adhesive and a few well-placed 18-gauge nails. 

Lastly, just be careful not to angle the nail up into the cabinet and poke a hole in the base of your new cabinets, if you don’t mind.

Step 5: Hide nail holes with Color Putty

Fill nail holes in toe kick with color putty

Installing cabinets requires hiding your minor imperfections and nail holes.
 
And that’s why every cabinet installation I’ve done uses Color Putty at the end to hide imperfections.
 
Since color putty rubs in with a finger and wipes off with a paper towel, it’s easy to use. And with color options from white to dark browns or even black, there are products you can use to hide the nail holes in the toe kick. Of course, these will all work well for hiding crown molding nails and any other trim you will tackle.
 
And Color Putty can be purchased in kits or individually based on your project (or comfort knowing you have the right color). I’d recommend the kit or at least 3-4 jars to custom mix the putty (yes, you can do that!) and adapt to grain or wood tone changes.

Frequently Asked Questions for Installing Toe Kick

Frequently Asked Questions

How do you attach toe kick?

After installing the cabinets, the toe kick is attached with a nail gun or adhesive.

What is the purpose of toe kick?

The toe kick allows for foot space under the cabinet to let the user stand directly in front of the cabinet. Without a toe kick, the user would need to bend forward.

How do you finish a toe kick on a cabinet?

Ideally, the toe kick will be completed before the installation, but if the toe kick needs to be finished while on the cabinet, a fast-drying stain and urethane can be used.

Summary

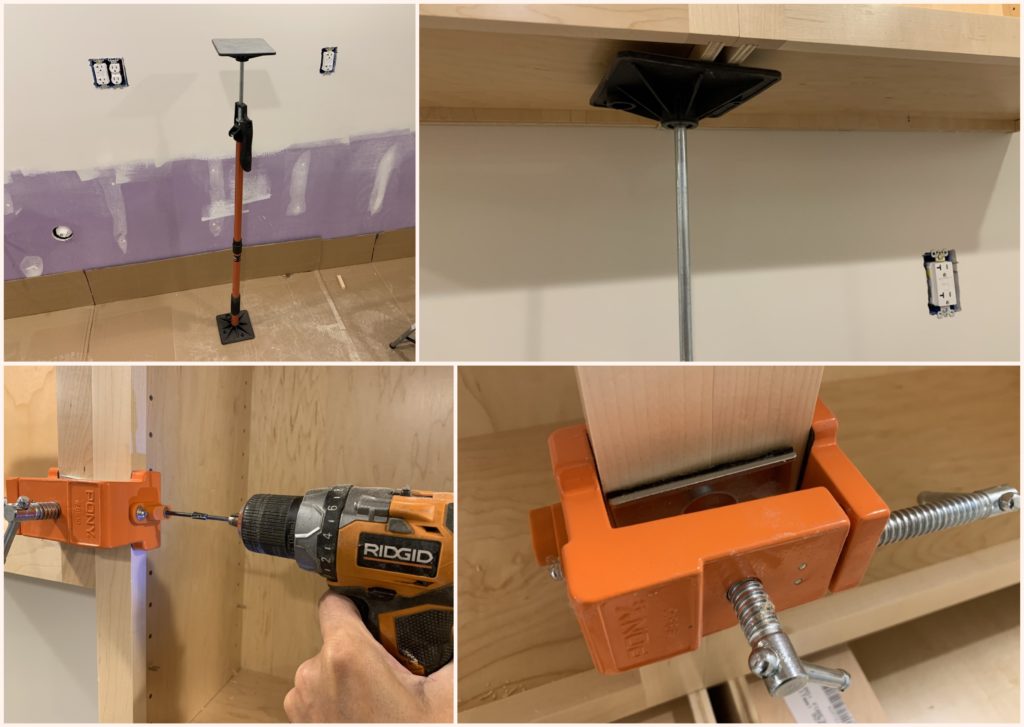
We hope this article helped you finish your toe kick installation. 

Check out our cabinet installation series for more tips to complete your installation.

SaleBestseller No. 1
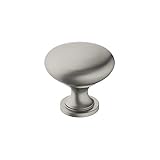
Amerock | Cabinet Knob | Satin Nickle | 1-1/4 inch...
  • 1-1/4 in (32 mm) Diameter Knob
  • Finished in Satin Nickel
  • Intricately crafted with precise detail for...
  • Includes mounting hardware: 8-32 x 1 in. Truss...
  • Complete with Amerock Guardian Lifetime Guarantee...
Bestseller No. 2
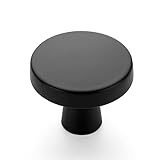
Romeda 18 Pieces Drawer Knobs, 30mm Black Cabinet...
  • Cabinet Knobs size: Each drawer knobs measures...
  • High quality material: The black cabinet knobs are...
  • Round design: The drawer knobs are round in...
  • Wide application: Cabinet knobs can be applied to...
  • You will get: 18 Pieces 30mm black drawer knobs,...
SaleBestseller No. 3
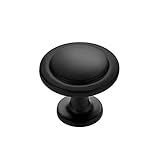
JOY DECOR 30 Pack Cabinet Knobs, Black Cabinet...
  • Durable Material: These cabinet knobs are crafted...
  • Round Edge Design: Upgrade your kitchen with our...
  • Easy Installation: Our black knobs offer two sizes...
  • 365 Days of Risk-Free Satisfaction: We offer 365...
  • Measurements: Overall Length: 2 inch (50mm),...
Bestseller No. 4
Ravinte 25 Pack Drawer Pulls 1-1/4 Inch Kitchen...
  • Dimensions: The heavy circular cabinet knob...
  • Wide Application: The solid matte black cabinet...
  • Easy Installation: Cabinet door knobs have a...
  • Solid Material: The cabinet pulls constructed by...
  • Risk-free 365 Days trial: We're so confident...
Bestseller No. 5
Franklin Brass Parow Cabinet Knob, Matte Black,...
  • STYLE: Easily update your kitchen and bathroom...
  • MATERIAL: Our matte black finish provides a...
  • SIZING: The collection of 1-1/8 in (29mm) cabinet...
  • DURABLE: We work with highly durable materials to...
  • EASE OF USE: Our parow cabinet knobs are specially...
Bestseller No. 6
Ravinte 30 Pack 1-1/4 inch Kitchen Cabinet Knobs...
  • Risk-free 365 Days trial: We're so confident...
  • EURO-STYLE: The cabinets knobs is an ideal way to...
  • Size of round Knobs:Diameter 1-1/4“ ; Base...
  • Durable design& fine touch: With advanced...
  • Simple look: The Black cabinet knobs have a wide...
Bestseller No. 7
30-Pack 2in Brushed Nickel Cabinet Knobs - Silver...
  • Sturdy & Durable Cabinet Knob - Our silver cabinet...
  • Modern T Bar Design - These T-bar cabinet pulls...
  • Wide Application on Different Scenes - These...
  • Easy Installation - With detailed installation...
  • Cabinet Handle Size - Overall Length: 2...
Bestseller No. 8
suiwotin 8pcs Green Ceramic Knobs, Vintage Kitchen...
122 Reviews
suiwotin 8pcs Green Ceramic Knobs, Vintage Kitchen...
  • Package Included: 8 x Ceramic Cabinet Knobs....
  • Exquisite & Retro: Constructed with ceramics and...
  • Decorative & Elegant: Glossy ceramic knobs are...
  • Easy Installation: Screw-on installing with screws...
  • SATISFACTION GUARANTEED: If you don't absolutely...
Bestseller No. 9
Asidrama 10 Pack Champagne Bronze and Matte Black...
  • Asidrama brand guarantee: We take your user...
  • Asidrama cabinet hardware:10 Pack knobs for...
  • Measurement: Overall Length 2"(50.5mm); Base...
  • Wide range of application: Asidrama furniture...
  • Asidrama handles are rigorously machined, robust...
SaleBestseller No. 10
CHEF TIME 30 Packs Kitchen Cabinet Knobs Brushed...
  • Easy to Install - 30 pieces small silver cabinet...
  • Wide Application - The mini drawer pulls and knobs...
  • Durable Design & Fine Touch - Small and light...
  • Package Include - 30 pieces small cabinet knobs,...
  • Please Note Before Purchase - The product is made...

Last update on 2024-04-16 at 03:33 / Images from Amazon

  • About the Author
  • Latest Posts
( Woodworker )

Eric has been a professional woodworker for over thirty years and has worked in small cabinet shops making everything from kitchen cabinets to hand-made furniture. Now working from a home woodworking shop Eric is sharing his passion for woodworking, tool advice and how-to knowledge from his Minnesota-based woodshop.

Need Wood?

Subscribe for a FREE directory to 300+ hand-selected local and online hardwood retailers.

Exterior Barn Door With Galvanized Hardware

Exterior Barn Doors, Hardware And How to Build One

Building an external barn door is a great DIY project. Since your construction doesn’t need to be picture perfect this style of door can be built and used on just about any outdoor structure. In this guide learn basic construction techniques and hardware to use outdoors.

Read More »
Festool Domino DF500

Domino vs Biscuit Jointer and When To Use Each One

While biscuit joiners have been around for decades it is only recently that the Festool DOMINO has become “the” tool to own for loose tenon joinery. In this article learn the differences between a domino joiner vs biscuit joiner and what’s best for your projects.

Read More »

Disclaimer: DIY projects can be dangerous, hire a professional (link to Home Advisor) if unsure.